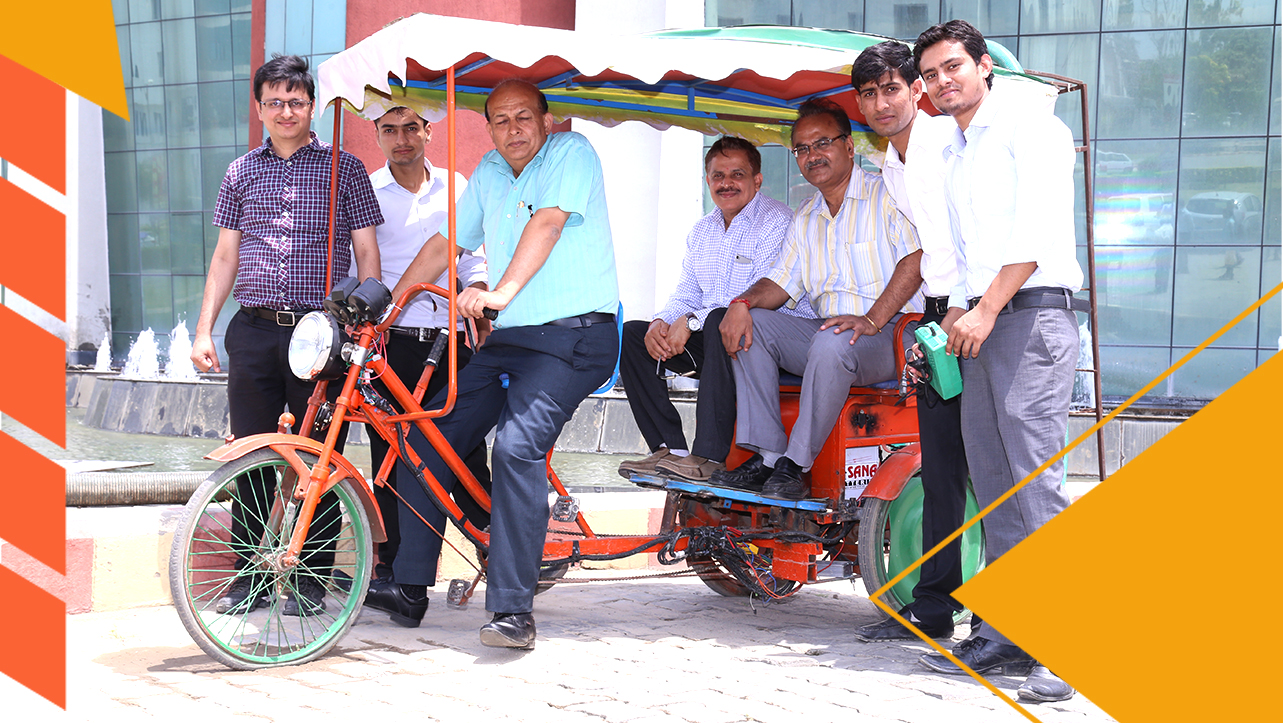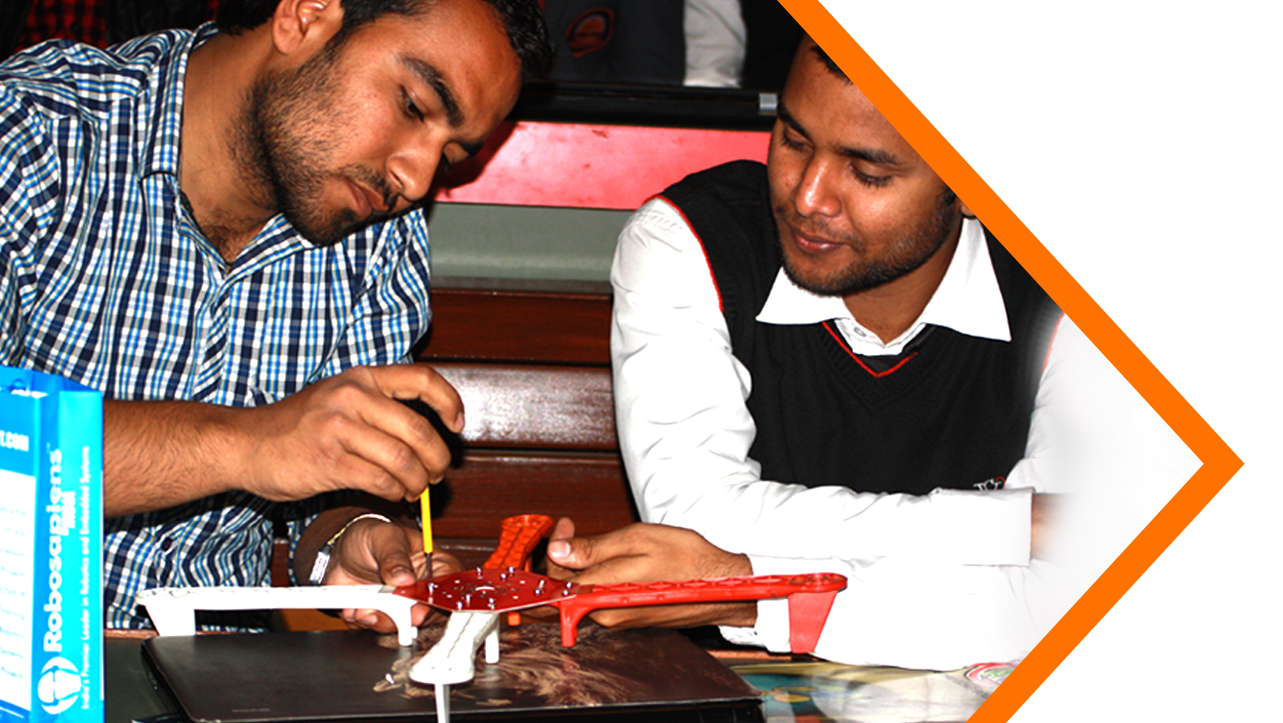
A Multipurpose Drone Developed by The Students of TMU
Drones offer the amazing ability to go where you could never go before and can experience views that you have never seen. TMU students have developed a new technology quadcopter or drone that can be used in mapping, surviving, videography, agriculture, monitoring, etc. Here, is the details about the drone.
The quadcopter is an Unmanned Aerial Vehicle (UAV) or drone with four rotors, each with a motor and propeller. A quadcopter can be manually controlled or can be autonomous. It is also called a quadrotor helicopter or quadrotor. It belongs to a more general class of aerial vehicles called multicopter or multirotor.
Small quadcopters are easy to build because of their low cost, low inertial force, and simple flight control system. Quadcopters provide stable flight performance, making them ideal for surveillance and aerial photography. Other application areas include delivery, land surveys, crop assessment, weather broadcasting and more. Quadcopters exist in many sizes, from palm-sized ones to those that can carry passengers or heavy cargo.
Civilian use of quadcopters is subject to regulations, which are not mature in many countries. However, quadcopters are an important part of future transportation called Advanced Air Mobility (AAM).
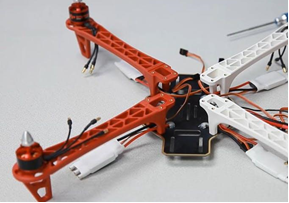
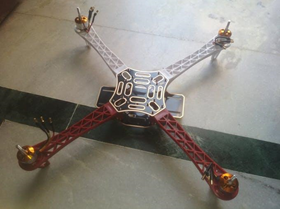
DJI F450 Frame: The frame that we have used is one of the best quality frames when it comes to quadcopters. The DJI F450 frame is named so because of its diagonal wheelbase i.e. the distance between diagonally opposite endpoints of the frame is 450 mm. The frame is made of ultra-strong material that makes it resistant to crashes. The arms of the drone are designed to support the flight of the drone. Apart from all these, there is an Integrated Power Distribution Board as well, which makes it easy to distribute power among the ESCs without using separate connections for all of them.
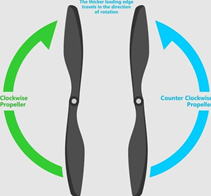
Propellers: Propellers are devices that transform rotary motion into a linear thrust. The drone propeller provides lift for the aircraft by spinning and creating an airflow, which results in a pressure difference between the top and bottom surfaces of the propeller. You can get a propeller of Glass fibre Up to 3-7 inches, 8-10 inches, 11 inches and above, along with propeller accessories. If you want lightweight and extra strength, you can prefer Carbon Fiber Propeller also. The Propellers are of two types. These propellers have a difference in the alignment of their blades, which you can observe if you compare them.
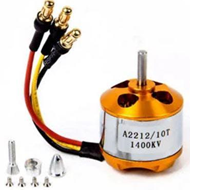
BLDC Motors: A brushless DC motor (also known as a BLDC motor or BL motor) is an electronically commuted DC motor that does not have brushes. The controller provides pulses of current to the motor windings which control the speed and torque of the synchronous motor. These types of motors are highly efficient in producing a large amount of torque over a vast speed range. In brushless motors, permanent magnets rotate around a fixed armature and overcome the problem of connecting current to the armature. The KV rating of a brushless motor refers to how many RPM it turns per volt. The KV rating on a BLDC motor is equal to RPM per VOLT applied to the motor. So, a BLDC motor with a kV rating of 1000 kV will spin at 1000 RPM when 1 volt is applied, if you apply 12 volts the motor will spin at 12000 RPM.
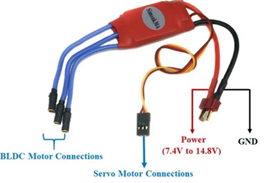
Electronic Speed Controllers: An electronic speed control (ESC) is an electronic circuit that controls and regulates the speed of an electric motor. It may also provide reversing of the motor and dynamic braking. An electronic speed control follows a speed reference signal and varies the switching rate of a network of field-effect transistors. By adjusting the duty cycle or switching frequency of the transistors, the speed of the motor is changed. It has two terminals on one side which are to provide power to the ESC and on the other side, it has three wires for connection with the motor and three more wires that are to be connected to the flight controller for receiving the Control Signal. Using ESC we can also provide a power of 5V which we will do here.
Assembling the Frame of the Drone:
In this step, the assembly of the drone's frame will be done. Along with the frame, motor placement and their connection with ESC will be completed. So you need to follow the instructions given below to get the frame ready:-
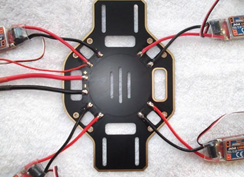
- In the frame accessories, you should have received two plates that you need to connect in between the arms of the frame. Out of these two plates, grab the bigger one. You will observe that there are solder pads present on the plate with some positive and negative signs on them. This board is the power distribution board of the drone.
- So, now take this power distribution board and attach the four legs of the frame to the plate and tighten them with screws. Now before placing the second plate, you need to complete some other things as well.
- Take the ESC and remove the connector that is attached to the power wires of the ESC. You can identify that by observing the no of wires attached to that connector and also the size of the connector. Once the connector is removed, take the soldering iron and attach the red wire of the ESC to the pad with the "+" sign on it and the black wire to the pad with the "-" sign.
- Repeat the process with all four of the ESCs and after that similarly, connect the LIPO battery but connect the battery through a switch which you can turn ON or OFF when you want.
- Now place the ESCs under the drone's arms with the help of cable ties and place the top plate of the frame as well.
- As the ESCs are connected, now you need to take the motors and put them in place i.e. the end of the drone's arms and tighten them with screws. Once this is done, you will see that three wires are coming out of the BLDC motor. You need to connect those three wires to the three wires coming out of the ESC.
- Take the middle wire of the motor, i.e the yellow-coloured wire, and connect that to the middle wire of the ESC. Connect the rest of the two wires as you want we will adjust them later on. Repeat the same step for all four motors but remember not to attach the propellers at this point.
With this the frame assembly is complete. Now in the next step, you need to calibrate the ESCs and adjust the directions of the motor rotation as well. Teerthanker Mahaveer University has formed collaborations with several recognised multinational companies and associations to ensure hands-on training to its students on the latest tools and techniques used in the industry so that they can develop new technologies and learn better.